Terraform Quickstart: Part 3 - Getting Started with Terraform
Install Terraform, Write Your First Configuration, and Learn the Basics of Terraform Workflow
In this chapter, you’ll install Terraform and start using it. You’ll learn the basics of HCL syntax and write your first configuration. You’ll also get familiar with the Terraform workflow. By the end, you’ll have deployed your first resource using Terraform.
Installing Terraform
Terraform runs as a command-line tool, and the installation process is straightforward.
The examples in this course have been tested on Ubuntu OS. For other installation options, head over to the official documentation.
$ wget -O - https://apt.releases.hashicorp.com/gpg | sudo gpg --dearmor -o /usr/share/keyrings/hashicorp-archive-keyring.gpg

$ echo "deb [arch=$(dpkg --print-architecture) signed-by=/usr/share/keyrings/hashicorp-archive-keyring.gpg] https://apt.releases.hashicorp.com $(lsb_release -cs) main" | sudo tee /etc/apt/sources.list.d/hashicorp.list

$ sudo apt update && sudo apt install terraform
Now, let’s check if the installation is successful:
$ terraform versionYou should see something like this:
Terraform v1.6.6You can now use Terraform CLI to deploy resources.
HCL Syntax and Structure
As mentioned in the previous lesson, Terraform uses the HashiCorp Configuration Language (HCL). It’s a declarative language designed to be both human-readable and machine-friendly.
Let’s have a look into the basics:
Blocks
Blocks are containers for related configurations. This is an example of a resource block:
resource "aws_instance" "web_server" {
  ami           = "ami-0c55b159cbfafe1f0"
  instance_type = "t2.micro"

  tags = {
    Name = "Web Server"
  }
}
The main block types include:
terraform: Core Terraform settings.provider: Configuration for a provider.resource: Defines an infrastructure component.data: References existing infrastructure.variable: Defines input variables.output: Defines output values.module: References reusable modules.locals: Defines local variables.
We’ll review each type in more detail later in this chapter.
Arguments and Expressions
Arguments assign values to names inside blocks:
resource "aws_instance" "example" {
  # Simple argument assignment
  instance_type = "t2.micro"

  # Expression using a variable
  ami = var.image_id

  # Conditional expression
  monitoring = var.environment == "production" ? true : false

  # Function call
  subnet_id = element(aws_subnet.example[*].id, 0)

  # For expressions
  dynamic "ebs_block_device" {
    for_each = var.block_devices
    content {
      device_name = ebs_block_device.value.name
      volume_size = ebs_block_device.value.size
    }
  }
}
Comments
HCL supports several comment styles:
# This is a single-line comment

// This is also a single-line comment

/*
   This is a
   multi-line
   comment
*/
Terraform File Structure
A typical Terraform project is organized into multiple files:
project/
├── main.tf        # Main resources
├── variables.tf   # Input variable declarations
├── outputs.tf     # Output values
├── providers.tf   # Provider configurations
├── versions.tf    # Terraform and provider versions
└── terraform.tfvars # Variable values (gitignored)
This is just a convention and not a requirement. Terraform reads all .tf files in a directory.
Terraform Components
Terraform uses a few key building blocks. Before we jump into practice, let's go through them.
Providers
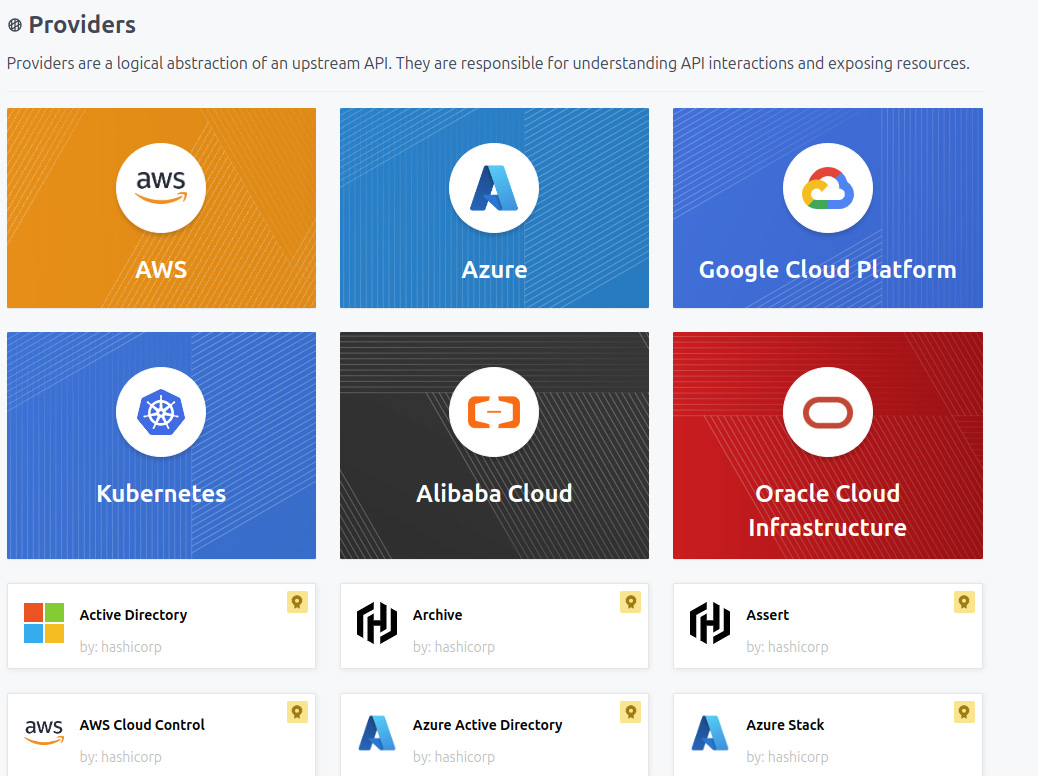
Providers are plugins that allow Terraform to interact with APIs. They include:
Cloud providers: AWS, Azure, GCP, DigitalOcean.
Infrastructure services: GitHub, Cloudflare, Kubernetes.
Local utilities: Random, Local, Template, HTTP.
You specify a provider in your configuration to tell Terraform what to manage.
Example AWS Provider configuration:
provider "aws" {
  region = "us-west-2"
  profile = "production"
}

provider "aws" {
  alias = "east"
  region = "us-east-1"
  profile = "production"
}
The alias parameter allows multiple configurations of the same provider.
Terraform has hundreds of providers. Feel free to browse the official docs. Each provider has documentation that explains how to use it.
Resources
A resource is an infrastructure component Terraform manages. It defines what Terraform should create, modify, or delete.
Example: Creating a S3 Bucket AWS resource:
resource "aws_s3_bucket" "example" {
  bucket = "my-tf-test-bucket"

  tags = {
    Name        = "My bucket"
    Environment = "Dev"
  }
}
Config overview:
Resource type (
aws_s3_bucket).Local name (
example).Arguments like
bucketsandtags.
All supported resource types and arguments can be found in the provider’s documentation.
State Files
What is Terraform State?
State is Terraform's way of mapping real-world resources to your configuration. It tracks:
Resource metadata.
Dependencies between resources.
Resource attributes and properties.
Mappings from resource names to provider IDs.
The state is stored in a file called terraform.tfstate by default.
Important: Never manually edit the state file! Terraform compares your code with the state file to detect changes. If you edit the state file manually, Terraform might not recognize existing resources.
Why State Matters
It serves several critical purposes:
Mapping Configuration to Resources: Connects your Terraform config to real-world resources.
Tracking Metadata: Stores resource dependencies.
Performance: Improves plan speed by caching resource attributes.
Collaboration: Enables team members to work on the same infrastructure.
State Storage Options
Local State (default):
Simple, but problematic for teams.
No native locking mechanism.
Must be manually backed up.
Remote State:
Stored on a shared location (S3, Azure Blob, etc.).
Supports locking to prevent concurrent modifications.
Team-friendly.
Better security for sensitive data.
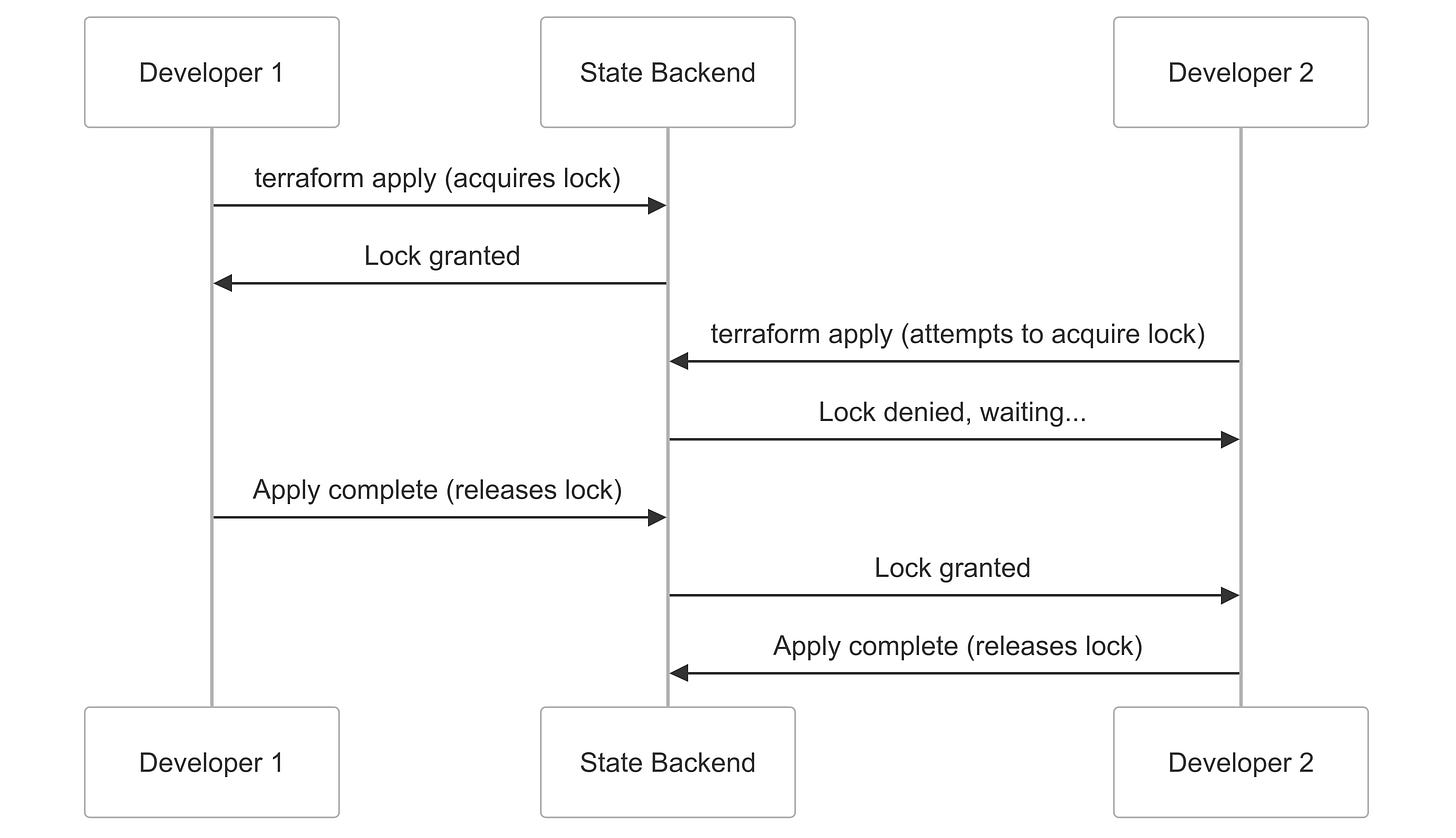
State Locking
State locking prevents concurrent modifications that could corrupt the state. For example, consider two developers trying to modify the same resource at the same time:
State Security Considerations
The state often contains sensitive data such as:
Database passwords.
Private keys.
Access tokens and secrets.
Best practices:
Enable encryption for the remote state.
Restrict access to state files.
Consider using a partial state with the
-targetflag.Use sensitive output values (
sensitive = true).
Variables and Outputs
Variables and outputs allow Terraform configurations to be flexible and reusable.
Variables
An example config to reuse the repo_name variable:
variable "repo_name" {
  default = "my-repo"
}

resource "github_repository" "example" {
  name = var.repo_name
}
You can define variables in several ways:
In the configuration (default).
In a
.tfvarsfile:terraform.tfvarsor*.auto.tfvars.On the command line:
terraform apply -var="region=us-east-1".As environment variables:
TF_VAR_region=us-east-1.
Advanced Variable Types
Terraform also supports complex data types:
# List of objects
variable "subnets" {
  type = list(object({
    cidr_block = string
    az = string
    public = bool
  }))
  default = [
    {
      cidr_block = "10.0.1.0/24"
      az = "us-west-2a"
      public = true
    },
    {
      cidr_block = "10.0.2.0/24"
      az = "us-west-2b"
      public = false
    }
  ]
}

# Map of objects
variable "users" {
  type = map(object({
    role = string
    permissions = list(string)
  }))
  default = {
    alice = {
      role = "admin"
      permissions = ["read", "write", "delete"]
    },
    bob = {
      role = "developer"
      permissions = ["read", "write"]
    }
  }
}
Outputs
They allow Terraform to display important information after running.
output "repo_url" {
  value = github_repository.example.html_url
}

output "load_balancer_dns" {
  value = aws_lb.web.dns_name
  description = "The DNS name of the load balancer"
  sensitive = true # Marks this output as sensitive
}
Outputs are displayed after the terraform apply command and can be queried using terraform output. This is helpful when you want to directly click on a URL.
After running terraform apply, you’ll see:
Apply complete! Resources: 1 added, 0 changed, 0 destroyed. Outputs: repo_url = "https://github.com/user/my-repo"Note that output marked as sensitive = true will be hidden:
Outputs:

load_balancer_dns = <sensitive>
Data Sources
Data sources let you fetch information from outside Terraform and use it in your configuration without creating or modifying resources. While resources create things, data sources look up existing things.
Data sources are read-only. You use them to query external data, like:
Getting details of an existing AWS VPC
Fetching a GitHub user or repository
Looking up AMIs (Amazon Machine Images)
Reading from files or APIs
They do not create or change infrastructure.
Example data source to check an existing GitHub repo and make its data available (e.g., name, visibility, etc.) inside your config:
data "github_repository" "example" {
  full_name = "some-org/some-repo"
}
Modules
Modules are reusable Terraform configurations.
Why Use Modules?
Consider this real-world problem:
A team member expresses frustration that their Terraform code is becoming unwieldy and hard to navigate with hundreds of resources in a single file.
How the solution could look like:
Refactor the code into multiple logical files based on resource types or workloads. Create a consistent naming convention for resources so they can be easily located across files. Use modules to encapsulate related resources.
When you incorporate modules, you:
Avoid repetition: Instead of copying code, use a module.
Improve maintainability: Updates apply to all instances.
Encapsulate logic: Keep things modular.
Example: A module to create multiple repositories.
module "repos" {
  source  = "./modules/github-repos"
  repo_names = ["repo1", "repo2"]
}
We will cover modules in more detail later.
Terraform Workflow Overview
Keep reading with a 7-day free trial
Subscribe to Curious Devs Corner to keep reading this post and get 7 days of free access to the full post archives.


