
GraphicsMagick: The Perfect Tool for Seamless Image Processing
Easily edit images via the command line


Are you looking for a robust image-processing tool that automates tasks and simplifies command-line editing? Enter GraphicsMagick. This powerful tool supports a wide array of operations, including resizing, watermarking, oil-painting simulations, and more.
What sets GraphicsMagick apart from its well-known counterpart, ImageMagick, is its superior performance.
In this tutorial, I'll highlight GraphicsMagick's impressive capabilities. You'll discover how to seamlessly edit images via the command line and automate tasks using shell scripts.
Let's dive in!
About GraphicsMagick
GraphicsMagick is an open-source image processing software. It supports multiple operating systems, making it a valuable tool for Windows and Unix-like systems. With a rich set of features, GraphicsMagick empowers users to resize, animate, convert images, and much more effortlessly from the command line.
In this article, I’ll be showcasing the features using Ubuntu. To install GraphicsMagick, run the following command:
sudo apt install graphicsmagickYou can then verify the installation using the alias gm:
gm versionBasic usage:
gm command {command-option} {input-file(s)} Demo
GraphicsMagick provides numerous options to edit images. All operations are well described on the manual page. I’ve picked a few interesting use cases to demonstrate its powers.
I’ll use this photo from Unsplash for this demo:

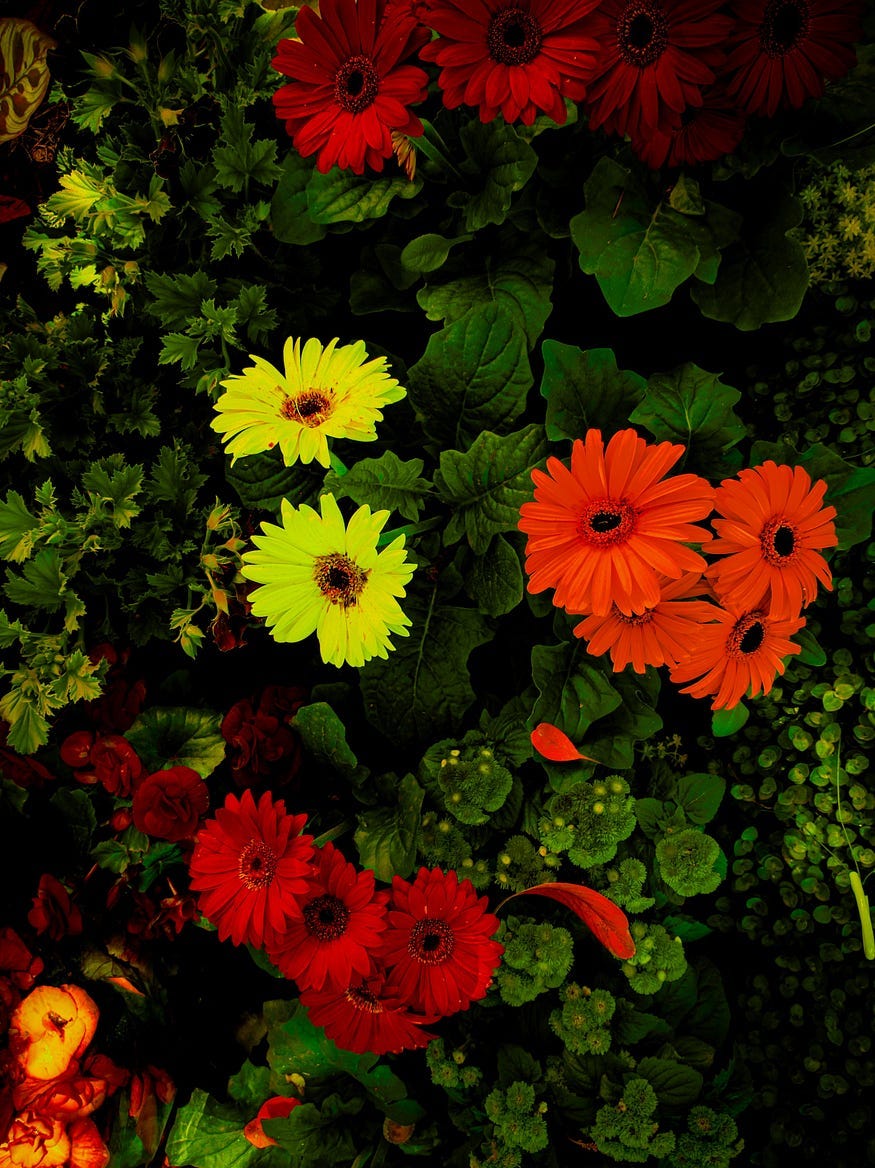
Simulate an oil painting
The -paint option in GraphicsMagick is used to simulate an oil painting effect. It reduces the level of detail in an image, creating a smoother appearance similar to that of an oil painting. You can use it like this:
gm convert flowers.jpg -paint 15 output_painted_flowers.jpgIt substitutes every pixel with the predominant color within a circular neighborhood defined by a specified radius.
By the way, if you want to see the progress of the conversion, you can add the -monitor option, and it will show you the percentage of the readiness:
gm convert flowers.jpg -paint 15 -monitor output_painted_flowers.jpg
  100% [flowers.jpg] OilPaint...
  100% [output_painted_flowers.jpg] Saving image: 3440x4592...
Result:
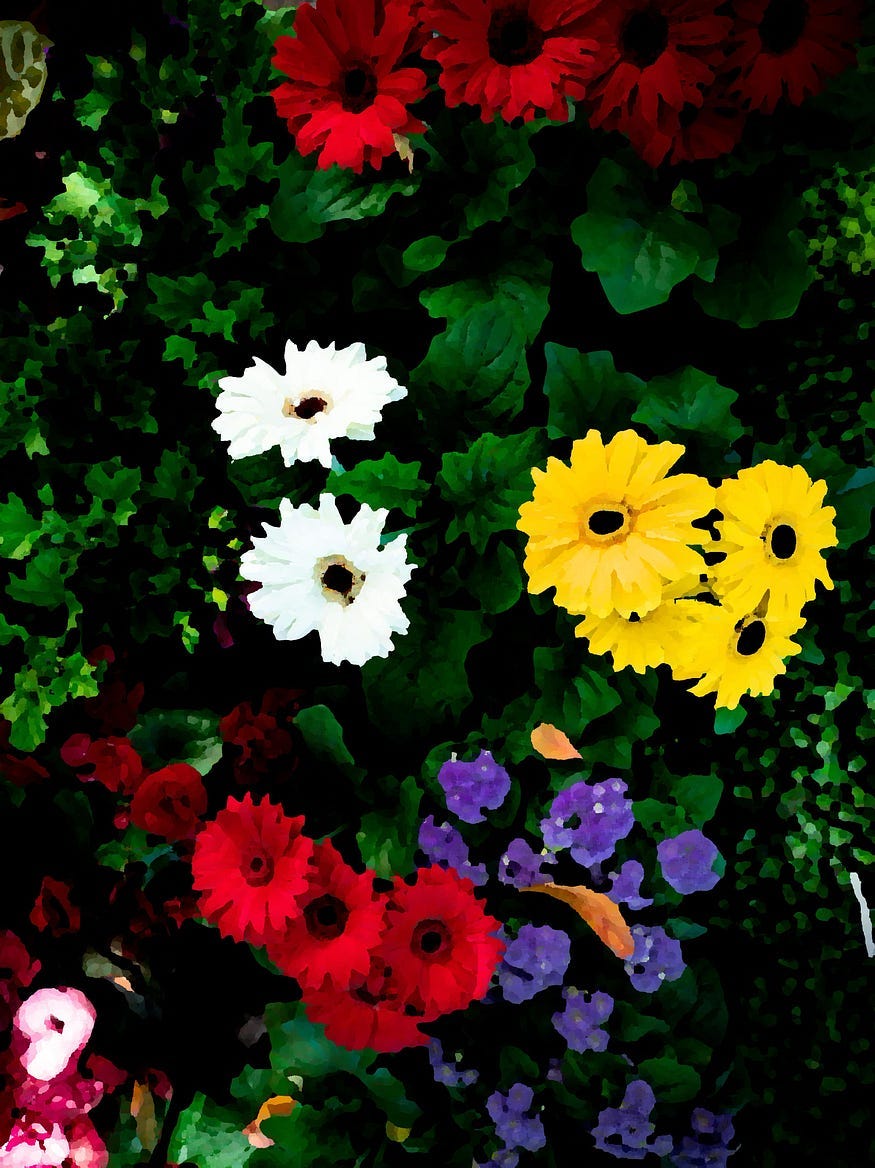
Image enhancement
You can enhance images by adjusting brightness, contrast, and sharpness. The default value is 100. You can modify it to manipulate brightness, saturation, and hue.
gm convert lofi_generator.png -modulate 90,110,80 lofi_generator_brightness.pngThis example decreases the brightness by 10%, the hue by 20%, and increases the saturation by 10%. If you leave some parameters empty, the value will stay unchanged.
Result:

You can combine -modulate with -colorize for more control over the colors.
gm convert flowers.jpg -modulate 90,110,80 -colorize 5,10,100 -monitor output_brightness_flowers.jpg
  100% [flowers.jpg] Modulate 90/110/80...
  100% [flowers.jpg] Colorize...
  100% [output_brightness_flowers.jpg] Saving image: 3440x4592...
It creates separate colorization values for the image’s red, green, and blue channels.
Result:
Creating animated GIFs
You can create animated GIFs from a series of images. This can be useful for creating simple animations or showcasing a sequence of images.
Let’s say you have a series of images named flowers1.jpg, flowers2.jpg, and so on, representing individual animation frames. To combine them into an animated GIF, you can use the following command:
gm convert -delay 50 -loop 0 flowers*.jpg animated_flowers.gif-delay 100sets the delay between frames in hundredths of a second. In this example, it's set to 50. You can adjust this value to control the speed of the animation.-loop 0sets the number of animation loops. Here,0means infinite loops. You can replace it with a specific number if you want a finite loop.flowers*.jpgspecifies the input file name pattern.animated_flowers.gifis the output file name for the animated GIF.
Image compression
gm convert -scale 200 flowers.jpg quality_flowers.jpgResult:
This command proportionally resizes the image to a width of 200 pixels, making it an effective parameter for substantial reductions in image and file sizes, ideal for generating web thumbnail previews.
Image processing task automation
The great thing about GraphicsMagick is that it can be used in simple shell scripts to automate tasks. You can create your own workflow.
For example, imagine you want to resize multiple images from an input directory, resize them, add a watermark, and save the output in a new directory.
#!/bin/bash

input_dir="/home/user/Pictures"
output_dir="/home/user/Pictures/outputs"
watermark_text="Kirshi"

mkdir -p "$output_dir"

# Iterate over each image in the input directory
for input_image in "$input_dir"/*.jpg; do
    # Extract the filename (without extension) from the full path
    filename=$(basename -- "$input_image")
    filename_noext="${filename%.*}"

    # Define the output path for the processed image
    output_image="$output_dir/$filename_noext.jpg"

    # Resize the image to a specific width (e.g., 800 pixels)
    gm convert "$input_image" -resize 800x "$output_image"

    # Add a watermark to the processed image
    gm convert "$output_image" -gravity southeast -pointsize 24 -fill white -draw "text 10,10 $watermark_text" "$output_image"

    echo "Processed: $output_image"
done

echo "Image processing complete!"
Result:

Pretty cool, isn’t it? Now, you don’t have to execute the steps from the workflow one by one.
Conclusion
In this tutorial, you discovered how to edit images using GraphicsMagick from the command line. We’ve only scratched the surface of the command options it offers, so I encourage you to experiment with the tool to unlock its full potential.
In conclusion, GraphicsMagick is a versatile and powerful tool for image processing. This tool is handy for everything from effortlessly resizing and enhancing images to automating complex tasks with simple shell scripts.
Thank you for reading, and see you next time!